
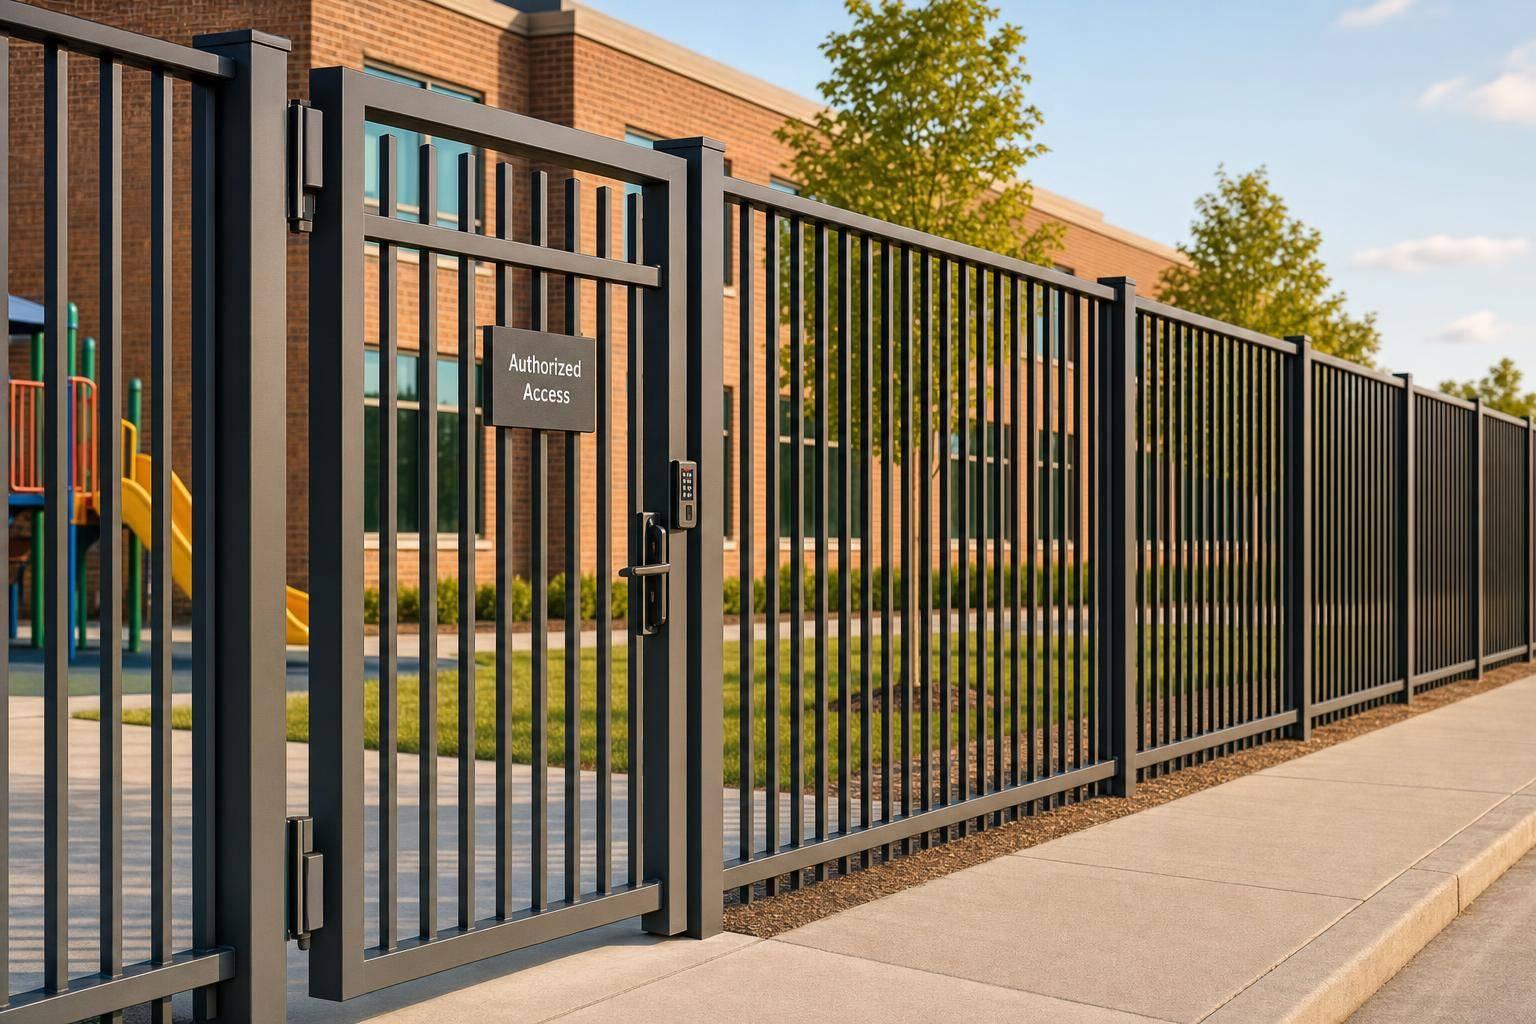
If I had to boil this down to one point, it’s this: most schools need a fence plan that covers height, material, gates, sightlines, and local code – not just a fence.
I’d start with a simple rule set:
- 4–5 ft fences fit basic boundary marking
- 6 ft is the common starting point for a school perimeter
- 7–8 ft fits areas that need tighter control, like utility yards, loading zones, and some street-facing edges
- Chain link, ornamental iron, and welded mesh keep views open better than wood
- Gates, egress, ADA access, and local code checks need review before installation starts
- Site conditions like slope, soil, drainage, and traffic flow affect how the fence should be built
In plain terms, I’d treat school fencing as a safety system, not a property marker. A fence helps keep students away from traffic, limits entry points, supports staff supervision, and shows the campus is being watched. In the U.S., that also means checking district rules, fire review, accessibility, and local building limits before ordering materials.
Quick comparison:
| Item | Best fit | Main point to check |
|---|---|---|
| 4–5 ft fence | Secondary edges, play area borders | Clear boundary, lower control |
| 6 ft fence | Main school perimeter | Standard campus security level |
| 7–8 ft fence | Utility, loading, street-facing zones | Tighter control and anti-climb details |
| Chain link | General campus use | Low cost, open views |
| Ornamental iron | Front edges and entrances | Appearance plus visibility |
| Welded mesh | Playgrounds, busy edges | Rigid build, climb resistance |
| Wood | Service screens, low-visibility spots | Blocks views, can create blind spots |
About 20% of public school students ages 5–17 traveled to school by walking in 2017, according to U.S. data from the National Center for Education Statistics. That alone is a reminder that perimeter design often has to deal with sidewalks, roads, gates, and student movement at the same time.
So if I were planning a school fence, I’d keep one question front and center: what parts of this campus need a clear boundary, and what parts need a stronger barrier?
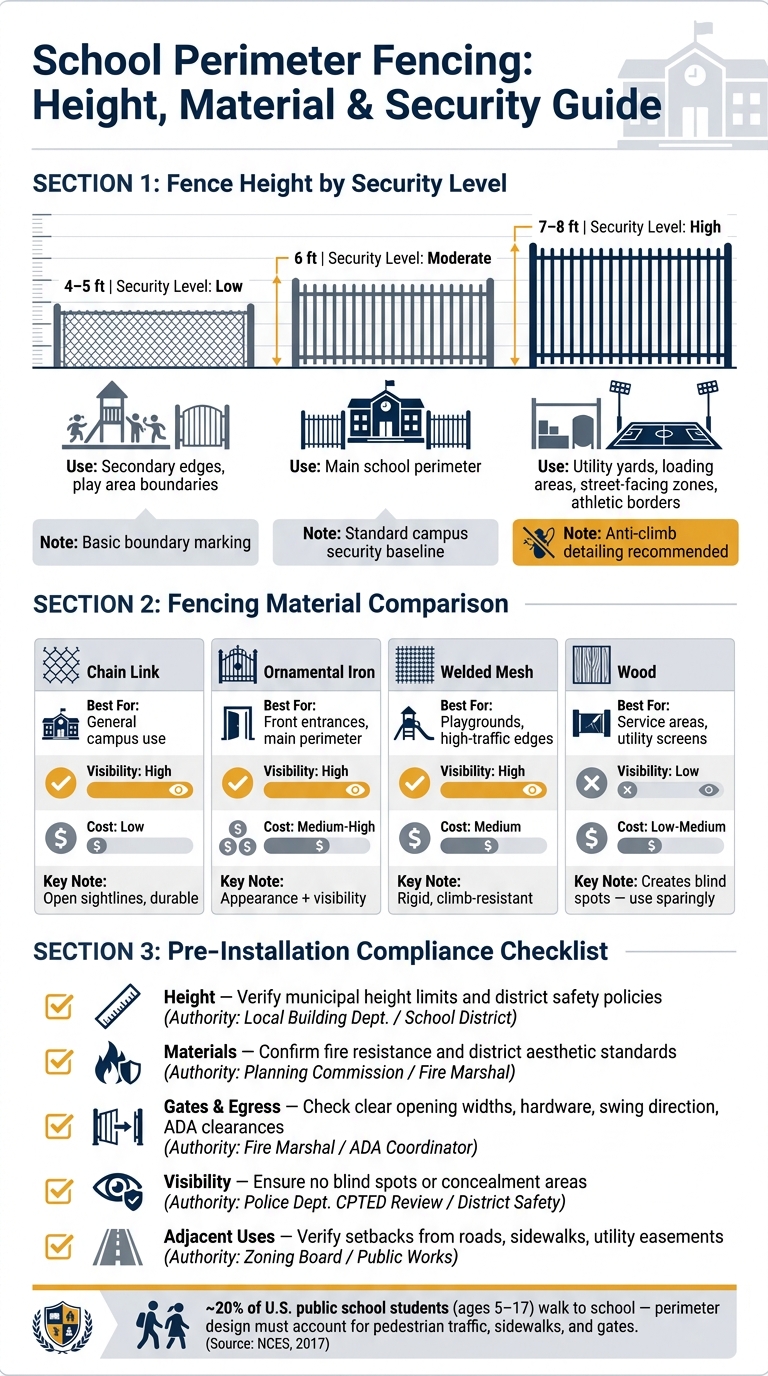
School Perimeter Fencing: Height, Material & Security Guide
Understanding "Perimeter Fencing": A Guide to Physical Boundaries
sbb-itb-d1d0a96
Fence Height: Choosing the Right Level of Security
Height is one of the fastest ways to match a fence to the job it needs to do. On a school campus, the right height comes down to control. Some areas just need a clear boundary. Others need a stronger barrier. Start with the ranges below, then go taller only where the site layout calls for it.
Common Height Ranges for School Perimeters
School fences usually land in three main height ranges.
4 to 5 ft works well for basic boundary marking along secondary edges, where clear definition matters more than deterrence.
6 ft is the standard baseline for a secure school perimeter. It gives you a solid middle ground between security and visibility.
7 to 8 ft makes sense for high-security zones, utility yards, loading areas, and street-facing or high-traffic edges. At that height, anti-climb detailing is often worth a closer look.
Where Taller Fencing Makes Sense on Campus
Not every part of a campus needs the same fence height. Some zones call for more protection than the main perimeter.
Utility yards and loading areas are usually the clearest match for 7 to 8 ft fencing because they often need tighter control. Athletic areas next to public spaces can also benefit from taller fencing, especially when anti-climb detailing is part of the plan.
Height Comparison by Security Purpose
| Height | Primary Use | Security Level | Visibility Impact | Common Campus Applications | Compliance Items to Verify |
|---|---|---|---|---|---|
| 4–5 ft | Basic demarcation | Low | Low | Secondary edges, play area boundaries | District policy |
| 6 ft | Standard secure perimeter | Moderate | Moderate | Main perimeter | District policy |
| 7–8 ft | High-security zones | High | Higher | Utility yards, loading areas, street-facing perimeters, athletic borders | District policy |
Materials and Design Features That Support Safety and Visibility
Once the height is set, the material does a lot of the heavy lifting. It shapes visibility, upkeep, and how easy it is to manage the fence day to day. Strength matters, of course. But so does being able to see through the perimeter. A fence that stays in good shape also makes supervision easier.
Chain Link, Ornamental Iron, Welded Mesh, and Wood
Chain link is the most common school fencing material. It keeps costs low, holds up well over time, and preserves open sightlines across the perimeter.
Ornamental iron gives the fence a stronger visual presence while still allowing similar visibility. That makes it a good fit for main entrances and front-facing perimeters, where appearance and line of sight both matter.
Welded mesh is a rigid, climb-resistant option that still keeps sight lines clear. It works well for playgrounds and high-traffic edges, where staff need a clear view and the fence needs tighter control.
Wood works better in places where limited visibility is acceptable, such as service areas or utility screens. It creates blind spots, so it makes more sense in spots where supervision is less important.
Design Details That Improve Perimeter Performance
Keep fence lines clear of vegetation, and lock gates that aren’t in use.
After choosing the material, the next step is to check gates and code requirements. That moves the discussion to gate width, accessibility, and code checks.
Codes, Gates, and Compliance Checks in the United States
Once you’ve settled on height and material, code review decides what you can actually build. School fence rules change from one state, city, district, and campus to the next. Site layout matters too. In plenty of cases, compliance ends up narrowing the height and material options you picked earlier.
Before any work starts, check local code, fire, ADA, and district safety rules with the right reviewers. That can include the building department, fire marshal, ADA coordinator, and district safety office. In many districts, all of them may need to sign off on the plan.
District Policy, CPTED, and Site Review Requirements
District policy and site review can add one more layer beyond local building code. These reviews often rely on Crime Prevention Through Environmental Design (CPTED), which treats the built space as a deterrent tool, not just a backdrop.
A CPTED review looks at sightlines, concealment points, and how well the fence separates students from parking lots, service roads, and public sidewalks. District safety teams often reject layouts that create hiding spots or blocked views.
Gate Width, Egress, and Accessibility Basics
Check clear opening widths, hardware that’s easy to use with one hand, and firm, stable paths leading to each gate. Egress routes need to stay open. Gate swing, hardware, and access controls also need to match fire and accessibility rules.
That connection matters. These details tie straight to student safety and day-to-day access control. Electronic access controls may be allowed where approved.
Compliance Checklist by Category
Use this table as a starting point. Then match each item against local rules and district-specific standards before construction begins. It’s smart to do this before ordering materials or booking installation.
| Category | What to Document | Reviewing Authority | Confirm Before Construction |
|---|---|---|---|
| Height | Height by zone | Local Building Dept. / School District | Check municipal height limits and district safety policies |
| Materials | Material and finish | Planning Commission / Fire Marshal | Verify fire resistance and district aesthetic standards |
| Gates/Egress | Clear opening widths, hardware type, swing direction | Fire Marshal / ADA Coordinator | Confirm gates don’t block evacuation paths and meet accessibility clearances |
| Visibility | See-through percentage, sightline coverage | Police Dept. (CPTED Review) / District Safety | Ensure no blind spots or concealment areas are created |
| Adjacent Uses | Setbacks from roads, sidewalks, and utility easements | Zoning Board / Public Works | Verify property lines and avoid interference with public infrastructure |
With code and gate requirements set, the next step is a site-specific installation plan.
Planning, Installation, and Final Takeaways
Once compliance is cleared, the next step is to turn those approved choices – height, material, gate placement, and code rules – into a job plan that works on the actual site. At this stage, the work has to hold up in the field, not just look fine on paper.
What a Site-Specific Installation Plan Should Include
A site-specific plan should carry forward the height, material, and compliance decisions that were already approved. This isn’t the point to revisit them. It’s the point to make sure they’re installed the right way.
Soil, slope, and drainage matter more than many people expect. They affect post setting and long-term stability. Rocky ground or fast-draining soil may call for deeper footings. Clear sightlines should also be kept around the perimeter, and hiding spots should be removed. That makes it harder to breach the perimeter.
Gate placement should match how people and vehicles move through the campus each day. Access points should stay locked, stay visible from a distance, and be watched by sensors or cameras. In practice, this extends the egress and accessibility rules already checked during the compliance review.
A solid plan should also account for:
- Post spacing based on local wind loads and soil conditions
- Footing depth that fits site demands
- Vegetation control around the fence line
- Weather inspection schedules built in before installation begins
Those details don’t just affect installation. They also shape upkeep over time. Keeping the perimeter clear supports visibility and access control, so maintenance isn’t a separate task tacked on later. It’s part of the same chain of decisions from the start.
Conclusion: Key Decisions That Shape a Secure School Perimeter
After the fence is in place, day-to-day results come down to maintenance and access control. Every design decision should tie back to one plain question: what does this campus need to help keep students safe? Height, material, gate design, and code compliance all stem from that answer.
Skip the site review or rush through compliance, and problems often show up later – when fixes cost more and disrupt more.
For projects in Plano, TX, and nearby areas, Tend Fencing provides site-specific installation for wood, ornamental iron, automatic gates, and chain link fencing.
A secure school perimeter starts with planning, not just the fence itself.
FAQs
How do we choose fence height by campus zone?
Choose fence height based on what each campus zone needs to do, then weigh security against how the site should look. A school edge by a busy road, for example, doesn’t need the same treatment as a play area or a service yard. The point is to map out clear zones of defense so you can see where a taller, stronger barrier makes sense for keeping intruders out or students in.
In busy or more sensitive parts of campus, extra height helps send a clear message: this is a protected perimeter. In other spots, a lower fence that’s clean and well kept may do the job just fine, especially when the goal is simple boundary definition without making the campus feel harsh or closed off.
What fence material is best for visibility and security?
Stainless steel mesh is a strong choice when you need both visibility and security. It creates a load-bearing barrier while still letting people see through it with a high level of clarity.
It’s also lightweight and flexible, which makes it useful for securing a perimeter without blocking sightlines.
Which permits and code reviews should schools check first?
First, check with your local building department to confirm which permits and code reviews you need. National rules still have to line up with local requirements at the installation site.
City tools can make this part a lot easier. For example, Plano’s eTRAKiT portal lets you review permit requirements and track inspections. You’ll also want to make sure the project meets general building codes along with any job-specific safety requirements.