
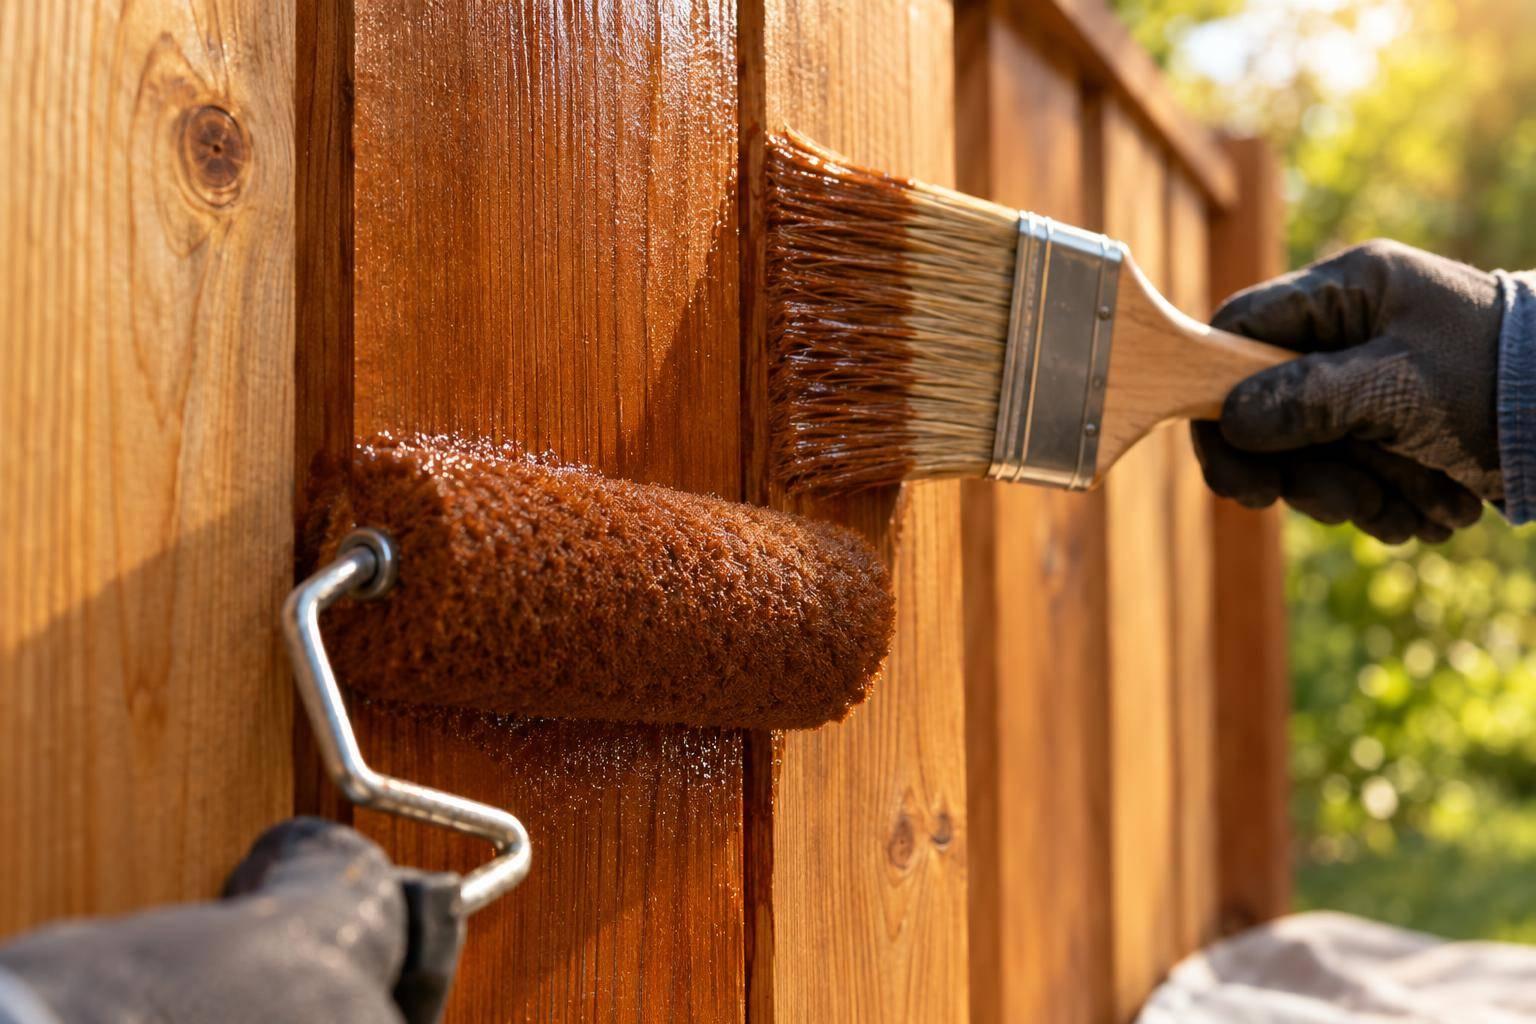
I use a roller for broad fence faces and a brush for edges and gaps, then immediately back-brush along the grain. My rule: work on a few full boards or 2–3 feet at a time, keeping the edge wet to avoid lap marks.
- Prep first: Clean and repair the residential fence, protect nearby surfaces, and test the stain in a hidden spot. After washing, I allow 24–48 hours or longer for drying and check moisture against the stain label.
- Apply evenly: I stir the stain, avoid overloading my tools, and brush out drips before they set. In Plano’s sun and wind, I work in smaller sections as needed.
- Let the label guide the finish: I follow its weather, coverage, coat-count, and recoat limits. <u>Dry to the touch does not mean cured.</u>
- Finish safely: I protect wet boards from water and contact, check for flaws after drying, and follow fire-safety rules for stain-soaked rags – never piling them in ordinary trash.
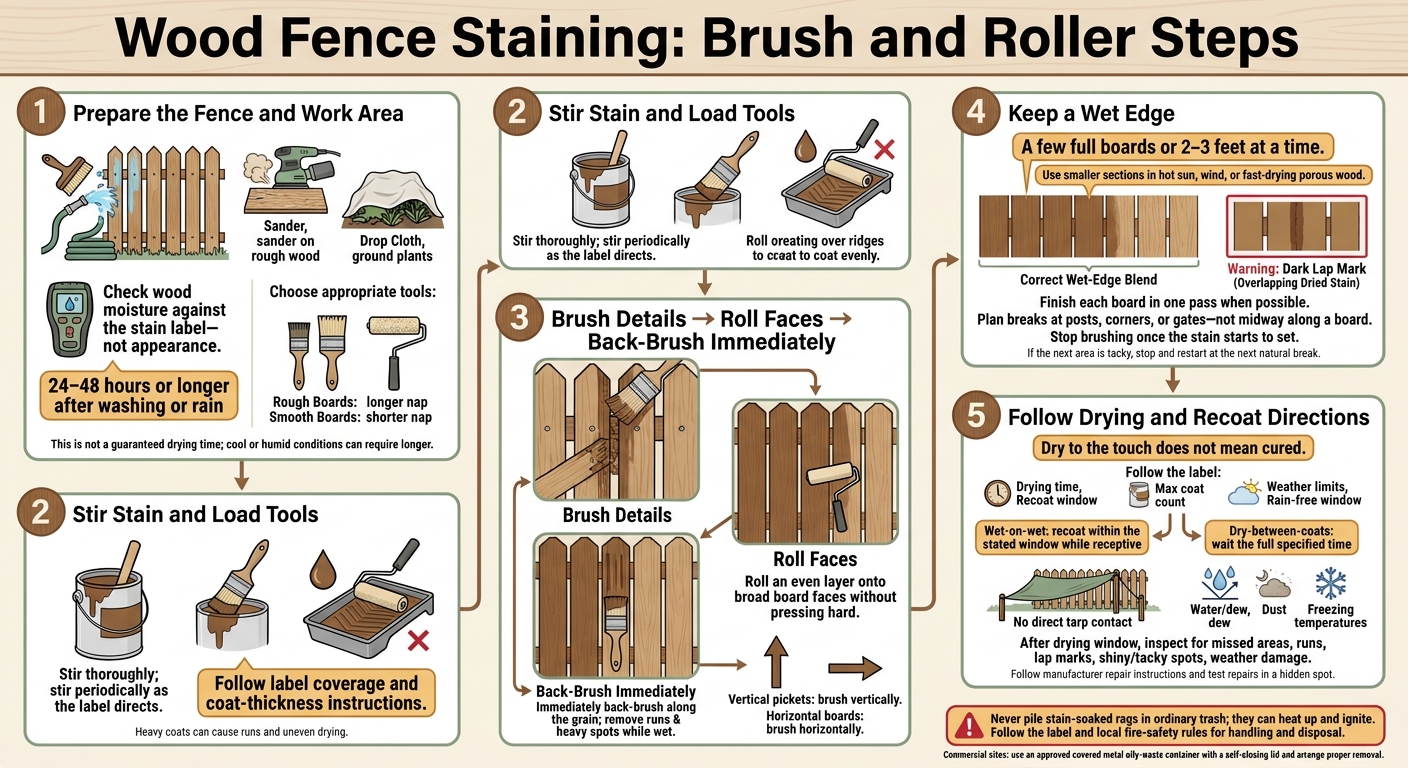
Wood Fence Staining: Brush and Roller Steps
Step 1: Prepare the Fence and Work Area
Check Wood Moisture and Weather Conditions
Choose an exterior stain approved for vertical wood surfaces. Follow the label’s limits for air and surface temperature, humidity, wood moisture, and rain-free drying time. In Plano, TX, hot sun, wind, and overnight dew can shorten your working time.
After washing or rain, the wood may need 24–48 hours or longer to dry in cool or humid weather. Check it with a moisture meter rather than relying on appearance. The reading should meet the stain label’s moisture limit.
Clean and Repair the Fence
Replace rotten or badly damaged boards, and secure loose fasteners. Use an appropriate wood cleaner to remove dirt, algae, mildew, and peeling or old finishes that prevent stain from soaking in. Follow the cleaner’s dwell time and rinsing instructions.
If you pressure wash, work carefully to avoid gouging the wood. Once the fence dries, sand rough spots and remove the dust. Let repairs cure and replacement boards reach the required moisture level before applying stain.
Trim vegetation that touches the fence, and move furniture and other removable objects out of the work area. Cover plants, pavement, siding, hardware, and doorways to catch drips. Test the stain in an inconspicuous spot to check color and absorption before coating the whole fence.
Choose a Brush and Roller Cover
After the fence passes the moisture check, choose brush bristles and a roller nap that suit both the stain label’s directions and the wood’s texture. Use a longer nap for rough boards and a shorter nap for smooth boards.
Gather a tray or bucket, stir sticks, gloves, eye protection, masking supplies, cleanup materials, and waste containers. With the fence clean, dry, and nearby surfaces protected, move to the first section and load your tools.
sbb-itb-d1d0a96
Steps 2–4: Load Tools and Apply Stain
Step 2: Stir the Stain and Load Tools
Once the fence is prepped and dry, load your tools and work one section at a time.
Stir the stain thoroughly before starting, then periodically as the label directs to keep the pigments evenly mixed. Dip only the brush’s working bristles and wipe excess stain against the container rim. Load the roller in the tray, then roll it over the ridges until it’s evenly coated – not dripping. Follow the label’s coverage rate and coat-thickness instructions. Heavy coats can cause runs and uneven drying.
Step 3: Brush Details, Roll Faces, and Back-Brush
Brush gaps, corners, board edges, fastener areas, and exposed end grain just ahead of the roller so these areas stay wet. Roll an even layer onto the board faces without pressing hard. Then back-brush immediately along the grain: vertically on vertical pickets and horizontally on horizontal boards.
Use light, continuous strokes to spread the stain and reach texture the roller misses. Before moving on, check recesses, board ends, lower edges, and spots around posts and hardware. Brush out runs and heavy spots while the stain is still wet.
If the brushed and rolled areas look different, adjust how you load your tools and work in smaller sections. Don’t try to fix the difference with a thicker coat.
Step 4: Keep a Wet Edge to Avoid Lap Marks
Work across a few full boards or 2–3 feet at a time. Make sections smaller if sun, wind, or porous wood causes the stain to dry quickly. Blend each new section into the adjoining wet edge with light strokes along the grain. Overlapping stain that has already dried can leave darker lap marks.
Finish each board in one pass when possible. Plan breaks at posts, corners, or gates – not midway along a board – and smooth out excess stain before stopping. Stop brushing once the stain starts to set. If the next area is tacky, stop and restart at the next natural break.
After completing the section, follow the label’s drying time before recoating.
How to restain a fence with a roller
Step 5: Follow Drying and Recoat Directions
After applying the coat, follow the label’s drying and recoating schedule before touching the fence again. Check its temperature and humidity limits, rain-free window, drying time, recoat window, and maximum coat count. Dry to the touch doesn’t mean cured or ready for use.
Let the label determine when to apply another coat. For wet-on-wet recoating, apply it within the stated window while the first coat is still receptive. For dry-between-coats products, wait the full specified time. Don’t recoat before the label allows it, even if the color looks uneven as it dries. Too much product can leave tacky spots, uneven gloss, or lap marks.
During the full label-specified drying period, protect the fence from rain, sprinklers, irrigation overspray, dew, high humidity, dust, and freezing temperatures. Keep vegetation, hoses, gates, tools, and furniture from rubbing against wet boards. Use barriers and signs to block access to wet surfaces, and don’t let a tarp touch the stained surface.
Once the drying window has passed, inspect the fence in steady daylight from several angles. Look for missed boards, runs, drips, puddling, shiny areas, lap marks, uneven color, tacky spots, dust, and damage from rain or contact. Follow the manufacturer’s repair instructions rather than automatically sanding or adding another coat. Test any repair in a hidden spot first.
Never pile stain-soaked rags in ordinary trash; they can heat up and ignite. Follow the label and local fire-safety rules for handling and disposal. Commercial sites should use an approved covered metal oily-waste container with a self-closing lid and arrange proper removal.
Conclusion: Finish Each Section Evenly
On the final pass, use a lightly loaded brush and roller. Back-brush along the grain, keep adjoining edges wet, and stop at natural breaks.
After each section, check for missed edges and stain buildup on rails and board ends. Keep the coat even, and follow the label’s coating and drying directions.
FAQs
How can I fix dried lap marks?
You’ll likely need to lightly sand the affected area of your wood fence to smooth the buildup where layers overlap. Wipe away the dust with a tack cloth, then reapply the stain or sealant.
Work in smaller sections and keep a wet edge by overlapping strokes before they dry. Follow the product’s directions for coat thickness and drying time.
Why is my fence still tacky after staining?
A tacky or sticky finish usually means the stain went on too thick. Rushing between coats or not allowing enough drying time can also trap moisture and prevent the stain from setting properly.
Apply thin, even coats, and follow the product’s directions for coat thickness and drying time. High humidity or temperatures outside the recommended range can also affect curing.
How do I stain both sides without drips?
Work from the top down, keeping a clean cloth handy to wipe up pooling stain or drips right away. Apply thin, even layers instead of thick coats to prevent runs. Follow the product’s directions for coat thickness.
If you’re using a sprayer, move the nozzle before pulling the trigger so you don’t soak one spot. Then back-brush the stain into the wood to spread excess product and get even coverage.