
When installing a privacy fence, even small errors can lead to costly repairs, legal issues, or structural problems. Here’s what to watch out for:
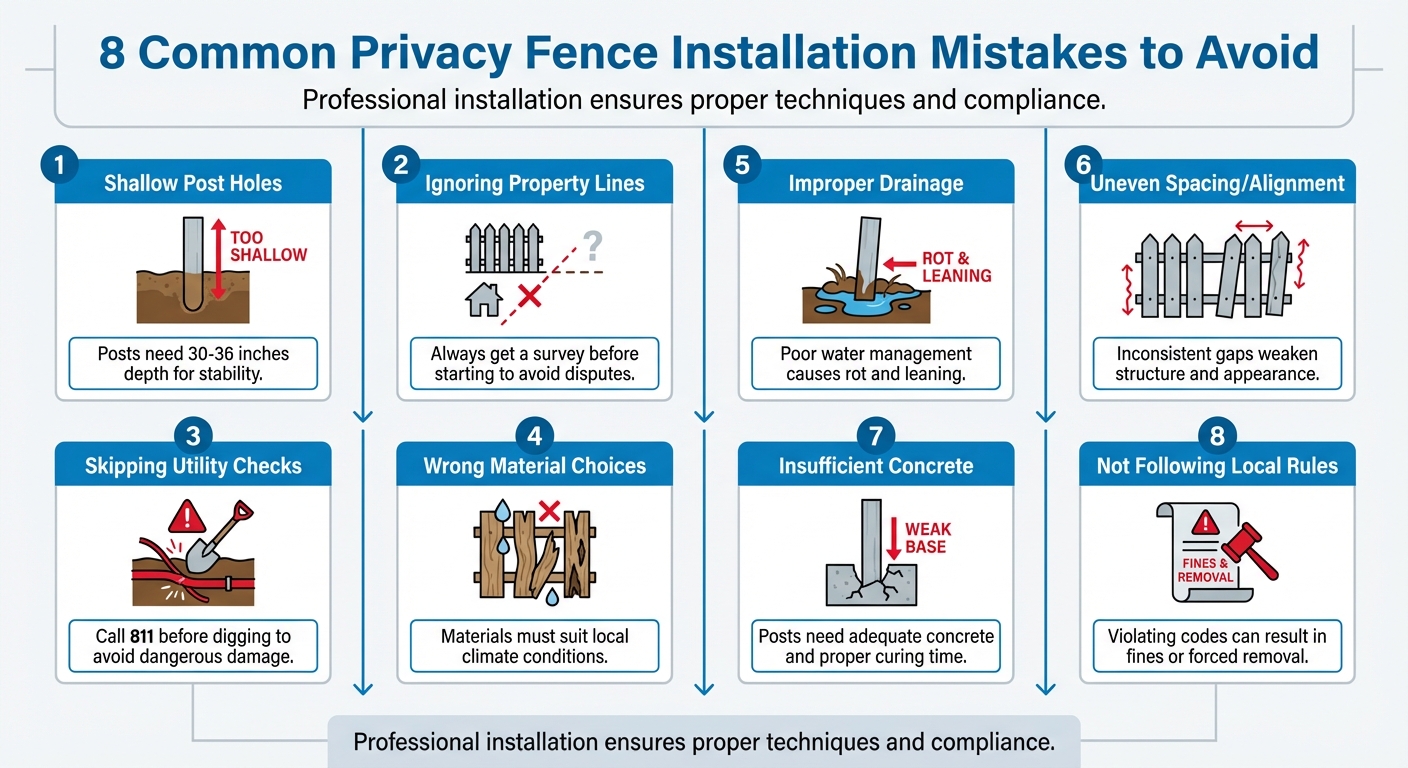
- Shallow Post Holes: Posts need to be buried deep enough (at least 30–36 inches) for stability, especially in areas with challenging soil or weather.
- Ignoring Property Lines: Fences placed outside your property boundary can lead to disputes or fines. Always get a survey before starting.
- Skipping Utility Checks: Call 811 before digging to avoid hitting underground lines, which could cause dangerous and expensive damage.
- Wrong Material Choices: Materials should suit your local climate to prevent warping, rotting, or other damage.
- Improper Drainage: Poor water management around posts can cause rot, rust, or leaning fences.
- Uneven Spacing or Alignment: Inconsistent gaps or misaligned boards can weaken the structure and ruin the appearance.
- Insufficient Concrete: Posts need enough concrete to handle wind and weight. Proper curing is also essential for long-term durability.
- Not Following Local Rules: Violating zoning laws or HOA guidelines can result in fines or forced removal.
Mistakes like these can compromise the strength and lifespan of your fence. Professional installation and replacement services ensure proper techniques, compliance with regulations, and materials suited for your environment.
8 Common Privacy Fence Installation Mistakes to Avoid
I Watched 100+ Fences Get Built… These 6 Mistakes Ruin Them
sbb-itb-d1d0a96
Wrong Post Placement and Depth
Getting post placement and depth right is crucial to avoid instability and even legal trouble. As Jenna Jonaitis, Contributing Writer at Angi, puts it:
"If your fence posts aren’t deep enough, the fence will lack stability and have a shorter lifespan."
Shallow posts or poorly placed ones can lead to structural issues, disputes with neighbors, and safety concerns. Here’s why both placement and depth matter so much.
What Happens with Improper Post Placement
Uneven spacing between posts – like placing some 6 feet apart and others 10 feet apart – can lead to uneven weight distribution. This can cause panels to sag and might even result in your fence encroaching on a neighbor’s property, opening the door to legal disputes . East Coast Fencing warns:
"Encroaching over a neighbour’s land (even by a gutter drips’ width) invites disputes."
To sidestep these problems, it’s smart to set your fence 2 to 6 inches inside your property line. Double-check property boundaries with a survey before starting. While proper placement lays the foundation, the depth of the posts is just as critical for long-term stability.
Why Post Depth Matters for Fence Stability
The depth of your fence posts plays a huge role in ensuring your fence stands strong through the years. A general rule of thumb is to bury at least one-third of the post’s total length underground. For example, a 6-foot privacy fence typically requires 2-foot-deep holes. However, factors like soil type and climate might call for deeper digging. Richboro Fence highlights the importance of getting this balance right:
"If you go too shallow, your fence will lean within a year. If you go too deep, you have wasted time and expensive materials."
Shallow posts are especially vulnerable to wind, and in colder regions, frost heave can push improperly set posts out of the ground. In areas like northern Pennsylvania, holes often need to be 3 to 4 feet deep to account for frost.
| Fence Height (Above Ground) | Recommended Post Hole Depth |
|---|---|
| 4 feet | 19–30 inches |
| 5 feet | 23–36 inches |
| 6 feet | 27–42 inches |
| 8 feet | 35–54 inches |
(Source: Rare Bears Fencing)
Gate and corner posts, which handle extra stress, require even more depth – add about 6 inches. For added stability, consider bell-bottomed holes, which are wider at the base to secure the concrete better. Laying 4 to 6 inches of gravel at the bottom of the hole improves drainage, and sloping the concrete away from the post prevents water from pooling, reducing the risk of wood rot. These steps are key to building a fence that is both strong and compliant with local codes.
Ignoring Local Rules and Property Lines
Overlooking local regulations and property boundaries can lead to costly mistakes. As Brenda Jude from House Digest explains:
"Building a fence isn’t just about aesthetics or privacy; it involves a tangle of laws that every homeowner must respect to avoid future headaches."
Just like weak posts can destabilize a fence, ignoring local rules can threaten its long-term success. Violations might result in fines, forced removal, or even lawsuits from neighbors [17,22]. When selling a property, title companies often check fence locations, and any violations could stall or cancel the sale. Additionally, fences built on utility easements risk being removed by utility companies without compensation.
Understanding Local Zoning Laws
Once you’ve planned your fence’s structure, complying with local regulations is just as important. Before starting, review three key layers of rules: city zoning codes, county building requirements, and HOA bylaws. For example, front yard fences are usually capped at 3 to 4 feet to maintain visibility, while backyard fences can typically reach 6 to 8 feet. In most areas, fences taller than 6 feet require a building permit, which can cost anywhere from $10 to $500 depending on your location and the project’s size [22,26].
If you live in an HOA community, their guidelines often take precedence over city regulations, especially regarding materials and colors. Always secure written HOA approval before applying for city permits. Properties in historic districts or on corner lots may face stricter rules, such as public hearings or "sight triangle" requirements to ensure clear views at intersections [24,26]. Skipping permits or approvals can lead to stop-work orders and hefty fines [17,18].
Once you’ve addressed zoning laws, focus on clearly defining your property boundaries to avoid further complications.
How to Avoid Property Line Disputes
Knowing your exact property lines is crucial for avoiding conflicts and ensuring your fence is legally placed. Nearly half of all property disputes arise from unclear boundaries. While visual markers like grass lines or old fences might seem helpful, they aren’t legally binding. My Garage And Gates emphasizes:
"A licensed land surveyor is the only accurate way to determine the legal property line before building a fence. Visual markers like grass lines, bushes, or old fences are unreliable."
To confirm your boundaries, hire a licensed surveyor to locate or install survey pins at your property corners. While this may seem like an extra expense, it can save you from the much higher costs of lawsuits or having to relocate the fence later. Many homeowners also choose to place their fences 2 to 8 inches inside their property line to avoid encroachment and allow space for maintenance.
Before breaking ground, check for underground utilities to avoid damage. It’s also a good idea to discuss your plans with neighbors early on and, if possible, get written agreements to prevent future disputes [17,18].
Choosing the Wrong Materials
Picking the wrong materials for your fence can lead to expensive repairs and a shorter lifespan. Research shows that 86% of fence failures are tied to construction issues, often stemming from poor material choices. Using materials that don’t suit your climate or maintenance preferences can result in warping, rotting, or higher upkeep costs.
The key is to choose materials that match your local weather and the amount of care you’re willing to provide. For instance, pressure-treated wood can last 25–30 years with proper maintenance, but without it, the lifespan drops drastically. As Allen’s Trading Co. explains:
"A well-maintained pressure-treated fence can last 25-30 years; a neglected one fails by 8-12 years."
Besides durability, material choice impacts how your fence looks and functions. Pine, a common softwood, tends to warp in extreme heat, while untreated metal rusts quickly in humid environments. If soundproofing is a priority, lighter metals won’t reduce noise as effectively as denser materials like wood or composite.
Selecting Materials Based on Climate
Your local climate plays a huge role in determining the best material for your fence. In hot, dry areas such as Texas, UV radiation can cause wood to crack and split, while vinyl may fade over time. UV-resistant vinyl or aluminum are better options for these conditions, as they resist the damage that heat and sunlight can cause. In humid or rainy regions, materials like vinyl or composite are ideal because they resist rot, mold, and fungi – issues that wood fences often face. Interestingly, Texas alone is home to over 10,000 fungi species, many of which contribute to wood rot in damp areas.
Coastal areas bring their own challenges, as salt air accelerates corrosion in standard metal fences and wears down paint and finishes. For these environments, materials like vinyl, PVC, or powder-coated aluminum are better suited to withstand the effects of salt exposure. In colder climates, freeze-thaw cycles can wreak havoc on wood, but materials such as ornamental steel, aluminum, or masonry handle these temperature swings and heavy snow loads much better. Craig Russell, Founder and CEO of The English Contractor, highlights the resilience of vinyl:
"Vinyl fencing is made to withstand the elements with minimal maintenance. There’s no need to worry about splintering, rotting, and repainting after a harsh winter or a stretch of heavy rainstorms."
Wind is another factor that’s often overlooked. Solid fence panels can face 3 to 4 times more wind pressure than designs with gaps. Allen’s Trading Co. warns about the “sail effect” caused by solid panels:
"Solid privacy panels create a ‘sail effect’ – they catch wind like a ship’s sail, creating enormous pressure on posts and panels."
For areas prone to strong winds, consider shadowbox or board-on-board designs. These allow air to flow through, reducing stress on the structure.
While climate is a crucial consideration, it’s not the only factor. Your budget, maintenance preferences, and aesthetic goals also play a big role in material selection.
Matching Materials to Your Needs
Your choice of materials should also reflect your budget, maintenance capacity, and desired look. Cedar and redwood are popular for their natural resistance to insects and decay, thanks to their natural oils. Western Red Cedar, for instance, costs $6 to $8 per 6-foot picket, while redwood is slightly pricier at around $8 per picket. According to Allied Fence:
"Western Red Cedar is especially popular for privacy fencing due to its balance of durability and appearance."
However, wood requires regular sealing to maintain its longevity. If you’re not up for that commitment, materials like vinyl and composite offer a virtually maintenance-free alternative, needing only an annual cleaning.
Cost is another major factor. In Texas, wood fences typically range from $15 to $35 per linear foot, vinyl costs between $25 and $50, and wrought iron can go as high as $100 per linear foot. Pressure-treated pine is one of the cheapest options at around $2 per 6-foot picket, but it requires frequent staining and is prone to warping. While the upfront cost might be lower, investing in more durable materials can save you money on repairs and replacements over time.
The hardware you use also impacts the fence’s longevity. Stainless steel screws – Grade 304 for inland areas and Grade 316 for coastal regions – are far more reliable than galvanized fasteners, which can rust and fail within 1–2 years in humid conditions. Some homeowners even opt for hybrid designs, using durable metal posts (galvanized or aluminum) combined with wood boards. This setup allows the posts to last over 30 years, while the boards may need replacing every 15–20 years.
Wrong Board Spacing and Alignment
Getting the spacing and alignment wrong on your fence can ruin both its appearance and functionality. Uneven gaps between boards not only look messy but also compromise privacy, allowing unwanted sightlines. Poor alignment creates a wavy, uneven fence line that undermines the overall structure. Even a small mistake, like a 1/16-inch gap error, can snowball into a full inch of inconsistency across a single panel, making the issue impossible to ignore. Michael Crow, a writer and woodworker at Fine Homebuilding, highlights this issue:
"A repeated spacing error of only 1⁄16 in. would compound into a 1-in. error across the panel."
These small errors can make the fence look amateurish and even weaken its structural integrity. To avoid these pitfalls, it’s important to focus on maintaining consistent spacing and alignment.
Keeping Board Spacing Consistent
The amount of space between boards depends on the type of fence you’re building. For solid residential privacy fences, a gap of 1/8 inch to 1/4 inch is generally recommended. This spacing strikes the right balance – providing privacy while allowing the wood to expand and contract naturally. If the boards are clamped too tightly, they can buckle or warp as they expand. Bonface Landi from DoItYourself.com explains:
"Clamping the boards tightly together can cause buckling of the wood as it struggles to find room for expansion and contraction."
On the flip side, gaps wider than 1/2 inch undermine privacy by creating visible openings. For styles like shadowbox or board-on-board fences, overlapping the boards by at least 1 inch on each side ensures privacy even if the wood shrinks. Jerry Gifford from Gifford Fence Orlando notes:
"If your overlap is too small, Florida’s sun will shrink those boards and leave you with gaps."
To prevent surprises, let your lumber adjust to the local environment by storing it in the project area for a few days before installation. This acclimation helps the wood adapt to humidity levels, reducing the risk of shrinkage or shifting. Using spacer tools cut to your desired gap size ensures consistent spacing throughout.
Fixing Uneven Board Alignment
Alignment is just as important as spacing for a professional-looking fence. A straight fence starts with the right tools and attention to detail. Stretch a taut string line between stakes at both ends of the fence to serve as a guide for a perfectly straight face. For the top of the fence, use a second string line to maintain a consistent height, often referred to as the "skyline." East Coast Fencing advises:
"Stretch a taut line for the fence face and another for top height. Measure post centres… from a fixed datum each time – don’t leapfrog."
Using a level on every third or fourth board ensures they remain perfectly vertical. Ryan Noonan, Content Editor at Angi, underscores the importance of using the right tools:
"Building a fence requires specific equipment to ensure it is level, deep enough into the ground and properly fastened together."
Before securing the final boards, measure the remaining space. If you notice slight inconsistencies, adjust the gaps of the last few boards by tiny fractions to make the correction seamless and unnoticeable. This attention to detail ensures your fence looks polished and professional.
Poor Ground Preparation and Drainage
Improper ground preparation can lead to leaning fences, sagging structures, and early deterioration. When the ground isn’t cleared and leveled properly, your fence is built on an unstable base that may shift over time. Add poor drainage into the mix, and the problems multiply – water pooling around fence posts can cause wood to rot, metal to rust, and soil to expand and contract, which pushes posts out of alignment. As Bob Carr from TLC Incorporated explains:
"Standing water along a fence line is almost never caused by a small, isolated issue. It almost always points to a larger drainage problem – one that affects the entire property."
Taking the time to address these issues before installing your fence can save you from expensive repairs later. At Tend Fencing, we prioritize these foundational steps, ensuring every fence we build is supported by a stable base and effective drainage measures.
Clearing and Leveling the Ground
A well-prepared ground is just as crucial to your fence’s stability as the depth of the posts. Start by walking the fence line to identify slopes, debris, or obstacles like rocks and tree stumps. Remove all debris and organic material. Trim back overhanging branches or shrubs that could obstruct the installation, and mow the grass short for a clean workspace.
Once the area is cleared, focus on leveling and grading. Use a shovel or landscaping rake to even out high and low spots along the fence line, ensuring consistent elevation. Tools like a string level, laser level, or bubble level can help verify that the ground is even before digging post holes. According to Gleave Construction, proper yard preparation can cut installation time by up to 40% and help avoid complications during the process. After leveling, compact the soil at post hole locations using a tamping tool or plate compactor. This step is especially important in sandy soil areas to prevent future shifting.
Planning for Drainage
Water is one of the biggest threats to fence durability. Look for signs of poor drainage, such as silt deposits, erosion channels, or puddles. Keep in mind that a single downspout can release 300–600 gallons of water during a storm, making it critical to identify where water originates and how it flows.
To combat drainage issues, grade the soil so it slopes away from the fence line. Adding gravel at the bottom of post holes can also help promote drainage. Even a small slope – just 1 inch over 10 feet – can significantly reduce water pooling. Andriy Boyko from A.O. Handy Inc. highlights the risks of ignoring drainage:
"Water pooling around wooden posts can lead to rotting, while metal posts can corrode. Even vinyl can suffer if the ground stays waterlogged, as the shifting soil can cause posts to lean."
For areas with persistent drainage problems, installing a French drain system can redirect subsurface water away from the fence. Additionally, leave a gap of 1 to 2 inches between the bottom of fence pickets and the ground. This allows water to flow freely instead of pooling against the boards, extending the life of your fence.
Using Too Little Concrete or Skipping Curing
Once you’ve prepared the ground and positioned the posts, the next critical step is setting them in enough concrete. This is what ensures the long-term stability of your fence.
Concrete is a must for a sturdy privacy fence. Skimping on it could lead to expensive repairs down the road. Think about it – privacy fences act like massive sails when the wind picks up. Without enough concrete anchoring each post, even a moderate gust can cause the fence to tilt or even uproot entirely. Rob Thibeault sums it up perfectly:
Fences that last for decades have two things in common: they are made from high-quality materials and they have a good foundation.
But wind isn’t the only issue. Using too little concrete can also let water seep under the posts. When that water freezes, the expanding ice can push the post out of the ground – a process called frost heave. Gate posts, in particular, face extra wear and tear from constant use. Without sufficient concrete, fence gate installation can become unstable, leading to costly fixes. Plus, many manufacturers only honor lifetime warranties if the posts are properly set in concrete.
Mixing Concrete Properly
The quality of your concrete mix plays a huge role in how strong and durable your fence will be. For standard 4×4 posts, you’ll typically need 1 to 2 bags of 60-lb concrete mix per hole. Gate posts, which bear more stress, usually require 2 to 3 bags. Make sure the diameter of the hole is appropriate – 9–12 inches for regular posts and 12–15 inches for gate posts.
Stick to the manufacturer’s recommended ratios when mixing. Adding too much water might make the job easier, but it significantly weakens the concrete’s strength. Dirk Tharpe warns against a common shortcut:
Packing dry concrete around a post has little benefit over compacted soil.
Always mix the concrete with water before pouring to ensure a strong, consistent bond. Once poured, shape the surface into a crown or slope it away from the post using a trowel. This prevents water from pooling around the base, which could weaken the structure over time.
Giving Concrete Time to Cure
Concrete doesn’t just dry – it hardens through a chemical reaction called hydration. Disturbing it too soon can prevent it from reaching its full strength. While fast-setting concrete might achieve an initial strength of 500 psi in just 30 minutes, that’s only the beginning. Dirk Tharpe explains:
The 30-minute set listed on Fast Setting Concrete Mix packaging… refers to ‘initial set.’ In field use, you have 3 to 5 minutes to complete the plumbing of the post.
Don’t mistake a firm surface for fully cured concrete. For regular posts, allow 24–48 hours to cure, and for gate posts, wait at least 48 hours. Use temporary 2×4 braces to keep posts perfectly plumb while the concrete sets. Proper curing can boost the concrete’s strength by as much as 50%. Keep in mind that full curing takes about 28 days, during which the concrete reaches its maximum strength. Temperature also plays a role – curing works best between 50°F and 85°F. If it drops below 40°F, the hydration process can stop entirely.
If you’re not confident in mixing or curing concrete yourself, you might want to check out Tend Fencing. Their team specializes in residential and commercial fence installation in Plano, TX, ensuring every post is set with precision for durability you can rely on.
Forgetting About Underground Utilities
Before you dig even a single posthole, it’s critical to know what’s lurking beneath your yard. Ignoring this step can lead to serious dangers and hefty expenses. Ashley Babcock, Director of Damage Prevention and Public Awareness at CenterPoint Energy, doesn’t mince words:
At CenterPoint Energy, one out of every ten damages to our natural gas pipelines last year were caused by someone building a fence. Hitting a gas line can be very dangerous and expensive.
Accidentally striking a buried utility can result in fines that reach five figures or trigger costly lawsuits. And it’s not just about money – you’re also risking electrocution, gas explosions, fires, and steep repair bills. In fact, utility strikes are the leading cause of delays in outdoor construction projects.
To avoid these risks, it’s essential to locate and mark utility lines before you start digging.
How to Check for Utility Lines
The process is simple: dial 811 at least 48 hours before you dig (excluding weekends and holidays). This free service notifies local utility companies, who will then send technicians to mark public utility lines – such as water, sewer, gas, and electric – up to your meter. Mark the perimeter of your planned fence line with white spray paint or flags so the technicians can easily identify your work area.
Once the markings appear in your yard, here’s what the colors mean:
| Utility Color Code | Type of Underground Line |
|---|---|
| Red | Electric Power Lines, Cables, Conduit |
| Yellow | Gas, Oil, Steam, Petroleum |
| Orange | Communication, Fiber, Alarm Lines |
| Blue | Potable Water |
| Green | Sewers and Drain Lines |
It’s important to note that 811 only covers public utilities. Private lines – like irrigation systems, gas lines for grills, or electric lines to detached sheds – are your responsibility to locate. If your utility meters are located at the edge of your property, consider hiring a private utility locating service. These services often use Ground Penetrating Radar (GPR) to trace lines from the meter to your home.
Once the lines are marked, respect the tolerance zone – usually 18 to 24 inches on either side of the marking. Within this zone, avoid power tools and use hand tools with blunt edges, like fiberglass shovels. Never assume a line is buried deep enough to be safe; erosion or past landscaping work can leave them just a few inches below the surface. Also, remember that locate tickets are only valid for 14 days, so if your project takes longer, you’ll need to submit a new request.
Dangers of Hitting Utility Lines
If you hit a gas line, stop what you’re doing immediately. Move away from the area without using any spark-producing devices, and call 911. A gas leak can lead to explosions and fires, putting your entire neighborhood at risk. Electric lines are just as hazardous – striking one can cause electrocution, power outages, and serious equipment damage. Even minor hits to communication or water lines can result in repair bills and legal liabilities that add up to thousands of dollars.
Every year, 34.9 million Americans dig without calling 811. Don’t be part of that statistic. A quick, free call can save you from catastrophic consequences.
Wrong Post Spacing
Proper post spacing is critical for building a fence that stands strong and lasts over time. As Liam Cope, Founder of Engineer Fix, points out:
"The distance between posts determines how effectively the fence resists lateral forces like wind and soil movement, which influences the aesthetic appearance over time."
For most residential privacy fences, the standard spacing is 6 to 8 feet from center to center. However, factors like fence height, material, and local weather conditions can influence the ideal spacing.
Standard Post Spacing Guidelines
When it comes to wood fences, spacing typically varies by height. For a 4-foot fence, 8-foot spacing works well, but for a 6-foot fence, reducing the spacing to 6 feet helps handle wind loads more effectively.
Vinyl fences are a bit different. Their spacing depends on pre-fabricated panel sizes, which are usually designed for 6- or 8-foot gaps. FenceScape advises:
"Stick to the manufacturer’s specs, period. If you try to stretch the panels to fit a wider gap, you will void the warranty and create a weak, sagging fence."
Chain link fences, thanks to their open mesh design, can handle wider spacing – typically 8 to 10 feet. However, in areas with high winds or loose, sandy soil, reducing the spacing by about 25% (e.g., from 8 feet to 6 feet) helps distribute the load more evenly and prevents structural issues.
Always measure post spacing center-to-center to ensure proper alignment of rails and panels. This precision is key to maintaining both the fence’s strength and its appearance.
Problems Caused by Wrong Spacing
Incorrect post spacing can lead to both aesthetic and structural problems. If posts are spaced too far apart, the horizontal rails bear too much weight, causing them to bow or sag – especially when heavy privacy pickets are added. FenceScape highlights the risks:
"Spacing posts too far apart overloads the horizontal rails, causing them to sag quickly. The money you save initially will be spent on future repairs."
The "sail effect" is another concern, particularly with solid-panel privacy fences. These panels can act like sails in strong winds, putting immense pressure on the structure. In areas with sustained winds of around 90 mph, standard 8-foot spacing may need to be reduced to 6 feet – or even 4 feet for 8-foot-tall fences – to prevent leaning or collapse during storms. On the flip side, spacing posts too closely wastes materials and makes the fence too rigid, which can lead to breakage as the structure struggles to flex with ground shifts or wind gusts.
For those in Plano, TX, expert installation services like Tend Fencing ensure precise post spacing, resulting in a strong and durable fence built to last.
Conclusion
The mistakes mentioned earlier can result in serious issues like structural instability, legal disputes, or safety hazards. Experts caution that skipping permits or using untreated materials may lead to fines, legal troubles, or fences that fail prematurely.
Fortunately, these problems are entirely avoidable with thoughtful preparation and execution. For instance, ensure posts are buried at least one-third of their length, use gravel to improve drainage, and select materials appropriate for your local climate. Key factors like proper post depth, compliance with local regulations, and smart material choices are essential for building a fence that stands the test of time.
For homeowners in Plano, TX, opting for professional services from Tend Fencing can make all the difference. Their licensed and insured team offers expertise in custom wood, ornamental iron, and chainlink fences, taking care of everything from accurate post placement to ensuring concrete cures correctly.
FAQs
How do I know my fence is on my property line?
Before starting your project, it’s essential to confirm your property boundaries. You can do this by referring to a property survey or plat map. These documents are often provided when you purchase your home or can be accessed through your local county recorder’s office. For precise results, hiring a professional land surveyor is a smart move.
It’s also important to review local setback requirements and consult your county’s GIS maps to double-check property lines. Taking these steps ensures your installation stays within legal boundaries and helps you avoid potential disputes with neighbors.
Do I really need a permit or HOA approval for a privacy fence?
Before installing a privacy fence, it’s crucial to understand local regulations and community rules. Many cities have specific requirements, like obtaining permits for fences that exceed a certain height. Ignoring this step might result in fines or even having to take the fence down. If you’re part of a homeowners association (HOA), they often have guidelines regarding fence height, style, and placement. To avoid complications, always review local permitting rules and HOA policies beforehand.
When should I hire a pro instead of DIY?
If you’re not confident in your skills, need precise property line measurements, or want to steer clear of expensive errors and potential legal troubles, hiring a professional is a smart move. Installing a fence involves more than just digging holes – understanding soil conditions, adhering to local building codes, and ensuring proper placement are all key factors. Experts bring the know-how to handle these challenges while making sure your fence is installed correctly and built to last. This is especially important for privacy fences, where selecting the right materials and positioning them accurately can make all the difference in avoiding future conflicts or unexpected costs.