
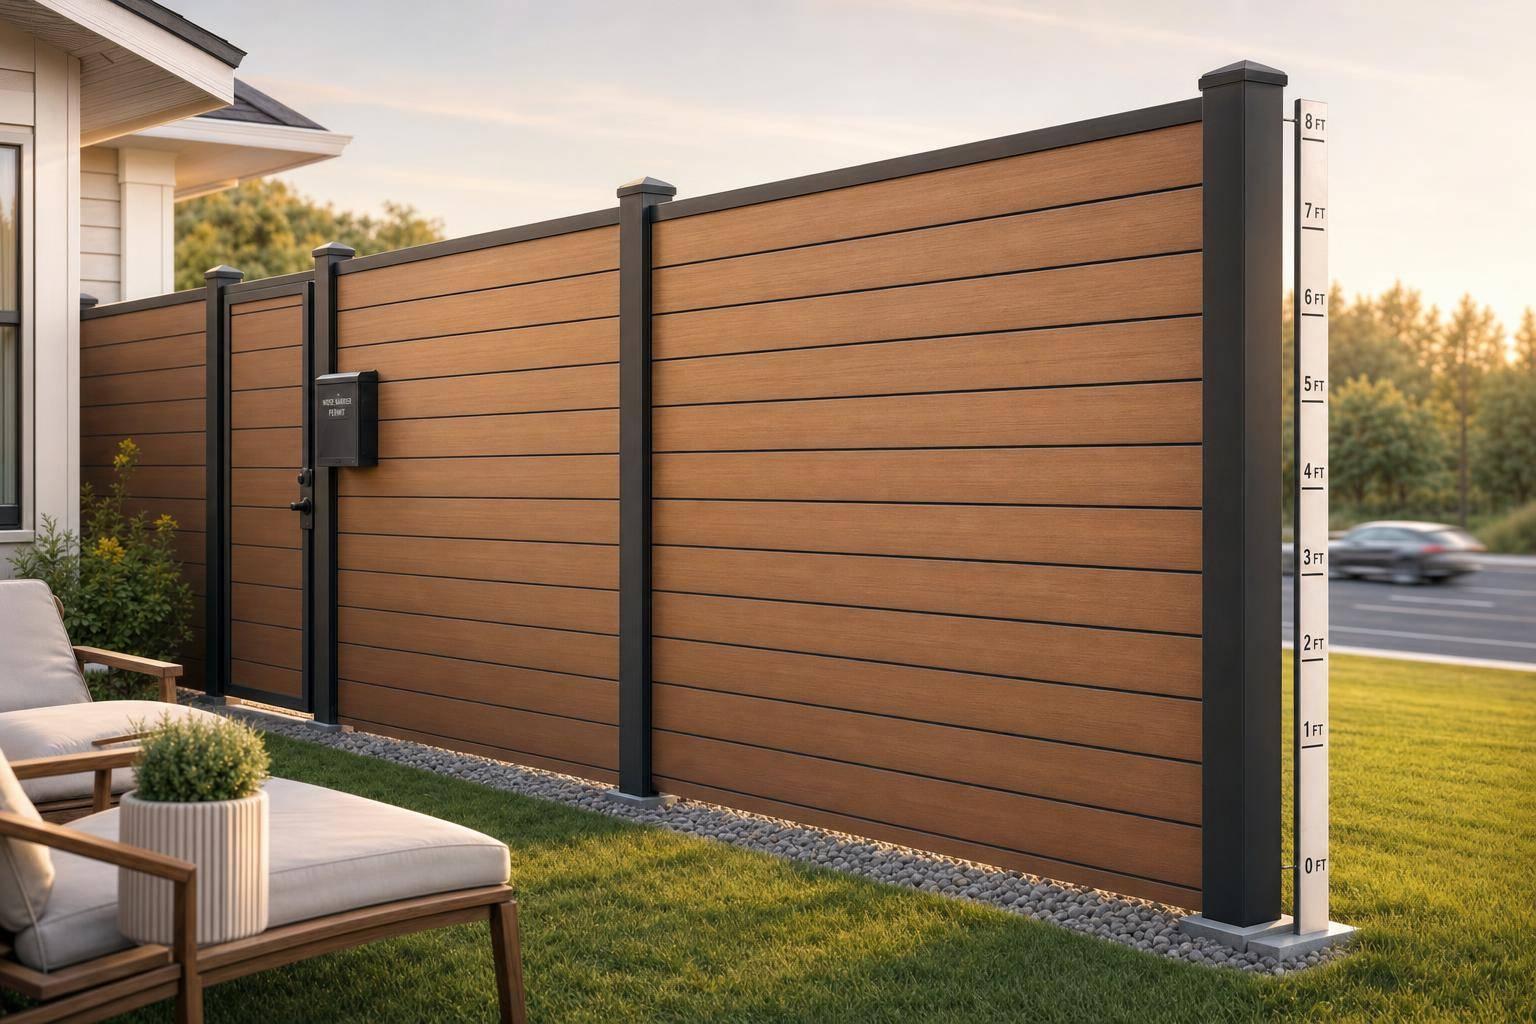
A noise fence only works if it’s tall enough, long enough, dense enough, and sealed tight. If you miss any one of those, traffic sound can still pass over, around, or through it.
If I were planning one, I’d focus on four things first:
- Height: usually 6 to 8 feet at minimum for road noise, with 10 to 12 feet sometimes needed
- Placement: put it as close to the noise source as code and lot lines allow
- Construction: use solid, dense panels and seal the base, seams, and gates
- Site limits: check permits, HOA rules, drainage, utilities, and grade before building
A solid fence can cut traffic noise by about 5 to 10 decibels. Some acoustic systems can cut as much as 28 decibels. But that only happens when the fence breaks the line of sight and stays free of gaps.
Here’s the short version of what I’d check before building:
- Code: local height limits, permits, setbacks, HOA rules
- Site: road location, patio/window location, slope, soil, drainage, utilities
- Size: enough height and run length to limit sound going over or around the ends
- Material: wood, composite, masonry, or acoustic panels with tested sound ratings
- Weak points: bottom gaps, panel seams, posts, and gates
- After install: routine checks for warping, settling, sagging gates, and new openings
DISCOVER The Best Fencing for Noise Reduction: Top Tips for a Quiet Home
Quick Comparison
| Area | What I’d look for | Why it matters |
|---|---|---|
| Height | Blocks the sightline from road to receiver | If sound can travel over it, noise drops less |
| Length | Extends past the protected area | Cuts sound wrapping around the ends |
| Placement | Close to the source | Improves the sound shadow behind the fence |
| Material | Solid, dense, tested panels | Light materials do little for traffic noise |
| Gaps | None at base, seams, or gates | Even small openings hurt performance |
| Maintenance | Regular inspections and repairs | A fence that opens up loses sound control |
Bottom line: I’d treat a noise barrier fence like a sound-control system, not just a privacy fence. That means checking the site, sizing it to break sightlines, picking dense materials, and sealing every weak spot before calling the job done.
1. Site and Code Checklist
Use these checks to lock in your design limits before you choose height, length, or materials.
Confirm local zoning, permits, and fence limits
Before you choose a fence height or material, check what your local code allows. Most U.S. cities and towns require a permit for fence installation. In many places, residential fence height limits fall between 6 and 8 feet. Some areas allow taller fences for noise control.
If you’re in Plano, TX, check the current city rules for maximum fence height, property-line setbacks, and corner-lot visibility triangles before you finalize the plan. HOA rules may be even tighter than city code, especially when it comes to height and approved materials.
Record the noise source and receiver locations
Map the roadway, your planned fence line, and the areas you want to protect, like patios, bedroom windows, and seating areas. This step matters more than it may seem. A fence that blocks noise well for one part of a yard may do a poor job for another.
Also note any grade changes between the road and your property. If the noise source sits higher than the receiver, you’ll usually need more fence height to make up for that difference.
Check soil, drainage, and underground utilities
Uneven ground and low spots can leave gaps at the base of the fence. And those gaps can let sound slip right through. Plan for stepped transitions or racking options so the barrier stays sealed to the ground.
Before you lock in the layout, confirm:
- Soil type
- Drainage conditions
- Underground utilities
- Easements
- Property lines
These checks can save you from layout changes later and help avoid code or installation problems.
sbb-itb-d1d0a96
2. Height, Length, and Placement Checklist
Once code limits and site conditions are clear, the next step is sizing the fence so it blocks sightlines and cuts down edge losses.
Check fence height to block line of sight
Start with height. The goal is simple: break the sightline between the road and the area you want to protect. In most cases, you need at least 6 to 8 feet for a meaningful drop in noise.
A 6-foot fence can help with light shielding. 8 feet is a common target for residential road noise. For sites with heavier exposure, 10 to 12 feet may be needed.
The fence should extend above the sightline between the noise source and the receiver. If height by itself still doesn’t block that path, the fix may be to make the fence longer or move it to a better spot.
Check fence length and end treatment to stop flanking
Height gets most of the focus, but length matters just as much. Sound can bend around the ends of a fence run. That’s called flanking, and it can cut into the barrier’s performance.
To help limit that, extend the fence well past the area you’re trying to protect. You can also add returns – short perpendicular sections at each end – to intercept sound that would otherwise wrap around the fence. In some layouts, a staggered fence line can also reduce end flanking.
Check placement and confirm no gaps
After you set height and length, place the fence to reduce flanking as much as possible. Put it as close to the noise source as property lines and local codes allow. A fence placed closer to the source usually creates a larger sound shadow and cuts flanking more effectively.
Then check for gaps. This is where many fences lose ground. Even small openings at the base or between panels can sharply reduce noise-blocking performance. After installation, inspect the full run for light, airflow, and openings at the base, panel seams, posts, and gates.
Gates need extra care because they’re often the weakest acoustic point in the entire fence line. Keep the number of gates on the noise-facing side as low as possible, and don’t place them in the highest-exposure sections of the fence.
"Small gaps can undermine the whole system. Watch for: bottom gaps from uneven grade, panel seams that are not consistently closed, openings around posts, and gate clearances." – Karim Daaboul, PrimeAlux
3. Material and Construction Checklist
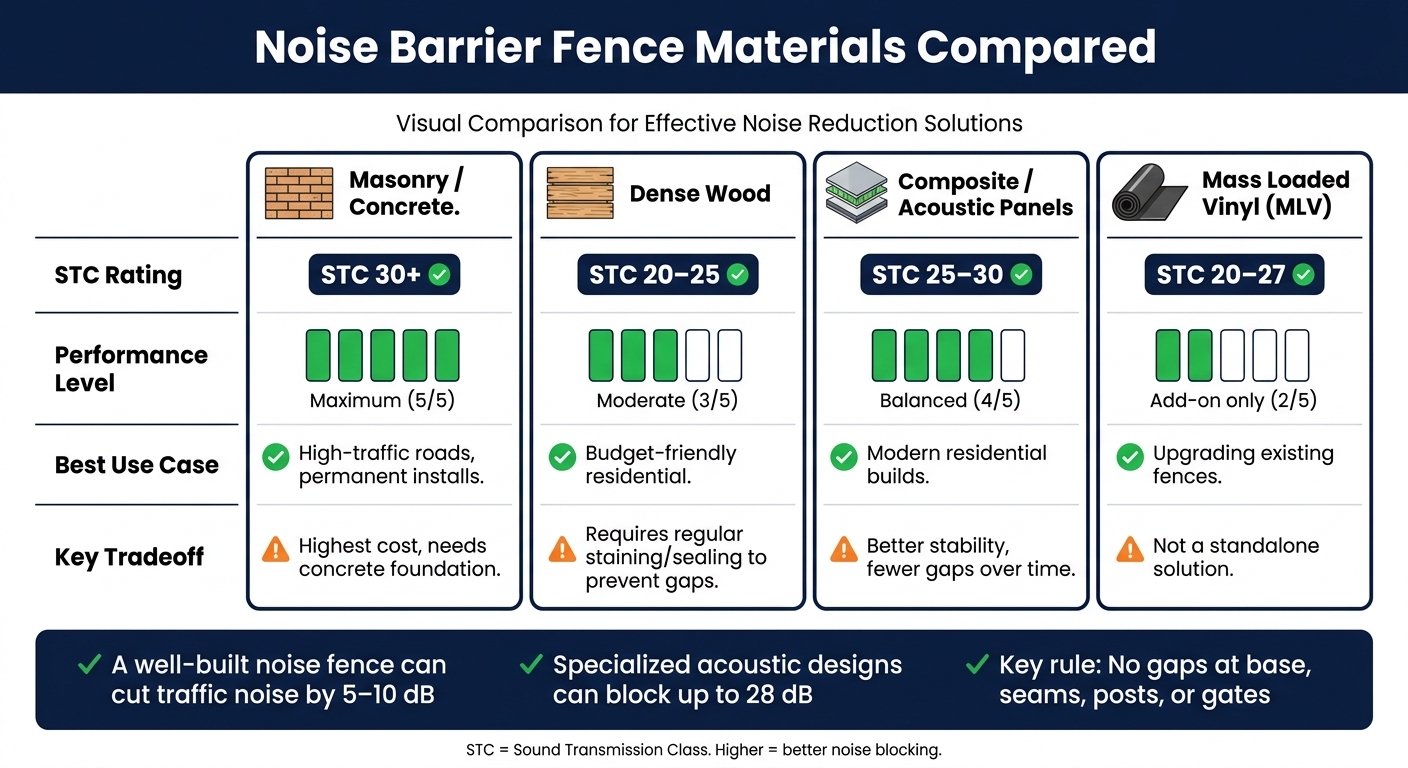
Noise Barrier Fence Materials Compared: STC Ratings & Key Tradeoffs
Once height and placement are locked in, the build itself makes or breaks the result. A fence can look solid from the street and still let noise slip right through if the material is too light or the joints aren’t tight.
Choose solid, dense materials with proven noise-blocking value
Start with solid, gap-free materials that have enough mass to block sound. In simple terms, heavier materials do a better job stopping sound waves.
For wood, effective sound barriers usually need a density of 40–50 pounds per cubic foot (PCF). Chain-link, by contrast, comes in at only 5–10 PCF. That gap is huge, and it explains why chain-link does almost nothing for traffic noise. Concrete can work well at just 0.5 inch thick because it has so much mass.
It also pays to look past sales language. Ask for STC ratings and ASTM test data. A higher STC number means better sound blocking performance.
Check joints, gates, bottom sealing, and structural support
Good material alone isn’t enough. If sound can get through seams, under the fence, or around the gate, performance drops fast.
Board-on-board and tongue-and-groove panels are a safer bet than standard lap joints, which can open up as wood shrinks. Deeper tongue-and-groove profiles help the joints stay closed as the wood weathers. Panel-to-post connections should stay tight, and capping rails help keep even pressure across the full fence run.
At the bottom, seal the base with acoustic sealant, rubber edging, or a buried bottom rail. Gates need the same level of care. Look for a tight fit, weatherstripping, and as few openings as possible on the noise-facing side.
Taller, denser fences also deal with more wind load than standard styles, so posts need to be set in concrete at the required depth.
"Acoustic fences are often taller and more solid than standard styles, which means they take more wind load." – Perfect Fence Company
Compare materials before making a final selection
This side-by-side view makes the tradeoffs easier to spot:
- Masonry/Concrete – Maximum blocking (STC 30+); best for high-traffic roads and permanent installs, but also the most expensive and labor-intensive option, with a continuous concrete foundation required
- Dense Wood – Moderate blocking (STC 20–25); the lowest upfront-cost choice for residential road noise, though it needs regular staining and sealing to help prevent warping and gap formation
- Composite/Acoustic Panels – Balanced performance (STC 25–30); better dimensional stability and fewer gaps over time than standard wood, which makes them a solid middle-ground option for modern residential builds
- Mass Loaded Vinyl (MLV) – Add-on only (STC 20–27); a lower-cost way to improve an existing wood or metal fence without doing a full rebuild
4. Final Performance, Maintenance, and Project Checklist
Check add-ons, landscaping, and reflection control
Use the final walkthrough to spot the weak points that hurt day-to-day performance. Before sign-off, walk the entire fence line and look for sound leaks at the base, seams, posts, and gates.
Here’s the simple test: if you can still see the noise source from the protected area, the barrier is too low or too short. Dense evergreens may help a little, but they only work as a supplement.
If your setup includes acoustic add-ons like mass-loaded vinyl (MLV) or sound-absorbing mats, inspect them closely. Look for tears, holes, or anything that has pulled loose. If you find openings anywhere in the barrier, seal them right away.
Set an inspection and repair schedule
The first inspection isn’t enough. To keep the barrier working, check it on a routine schedule. Wood can warp or shrink over time. Gates can sag or slip out of alignment. Soil can settle and leave gaps at the base. That’s why regular inspections matter, along with an extra check after severe weather.
When you spot a problem, fix it fast. Even small openings can sharply cut the fence’s noise-reducing performance.
"Log inspections to track wear and schedule repairs." – Richard Novigrod, Owner of Sierra Fence, Inc.
Keep permit approvals, inspection logs, and repair receipts in the project file. That gives you a clear record for compliance and any warranty-related work.
Conclusion: Use the Checklist to Avoid Weak Points
A noise barrier fence is only as good as its weakest point. Check local zoning, permit rules, and any HOA approvals before work starts. Build for full line-of-sight blocking. If the noise source is visible, the fence isn’t tall enough. Extend the fence far enough on both ends so sound doesn’t wrap around it, and make sure the build has no gaps.
Use dense, solid materials with verified STC ratings. Seal every joint and the base. Give gates the same care as the main panels. Then keep the fence in good shape with scheduled inspections and prompt repairs.
A well-built fence can cut traffic noise by 5 to 10 decibels, and specialized acoustic designs can block up to 28 decibels. But that result depends on one thing: the barrier has to stay tight and intact over time.
FAQs
How do I know if my fence is tall enough?
For noise reduction, your fence needs to block the direct line of sight between the noise source and your yard.
A common rule of thumb is to make the fence at least 50% taller than the noise source. In many cases, a fence height of 6 to 8 feet is often recommended.
Before you lock in the design, check local zoning rules and HOA guidelines for height limits.
What fence material blocks road noise best?
Dense, heavy materials like concrete, masonry, brick, and stone do the best job of blocking road noise. The reason is simple: more mass means less sound gets through.
Wood can work too, as long as it uses solid boards with no gaps. No matter which material you choose, the fence needs to be solid, continuous, and about 6 to 8 feet tall to do its job.
Can a noise barrier fence work on a sloped yard?
Yes, but it takes careful planning to keep sound from slipping through. On a slope, the main issue is the gaps that can form along the bottom edge where the fence meets the ground, especially the triangular openings you often see with standard installs.
To work well, the fence needs stepped transitions or custom racking so the surface stays continuous and sits flush with the grade.