
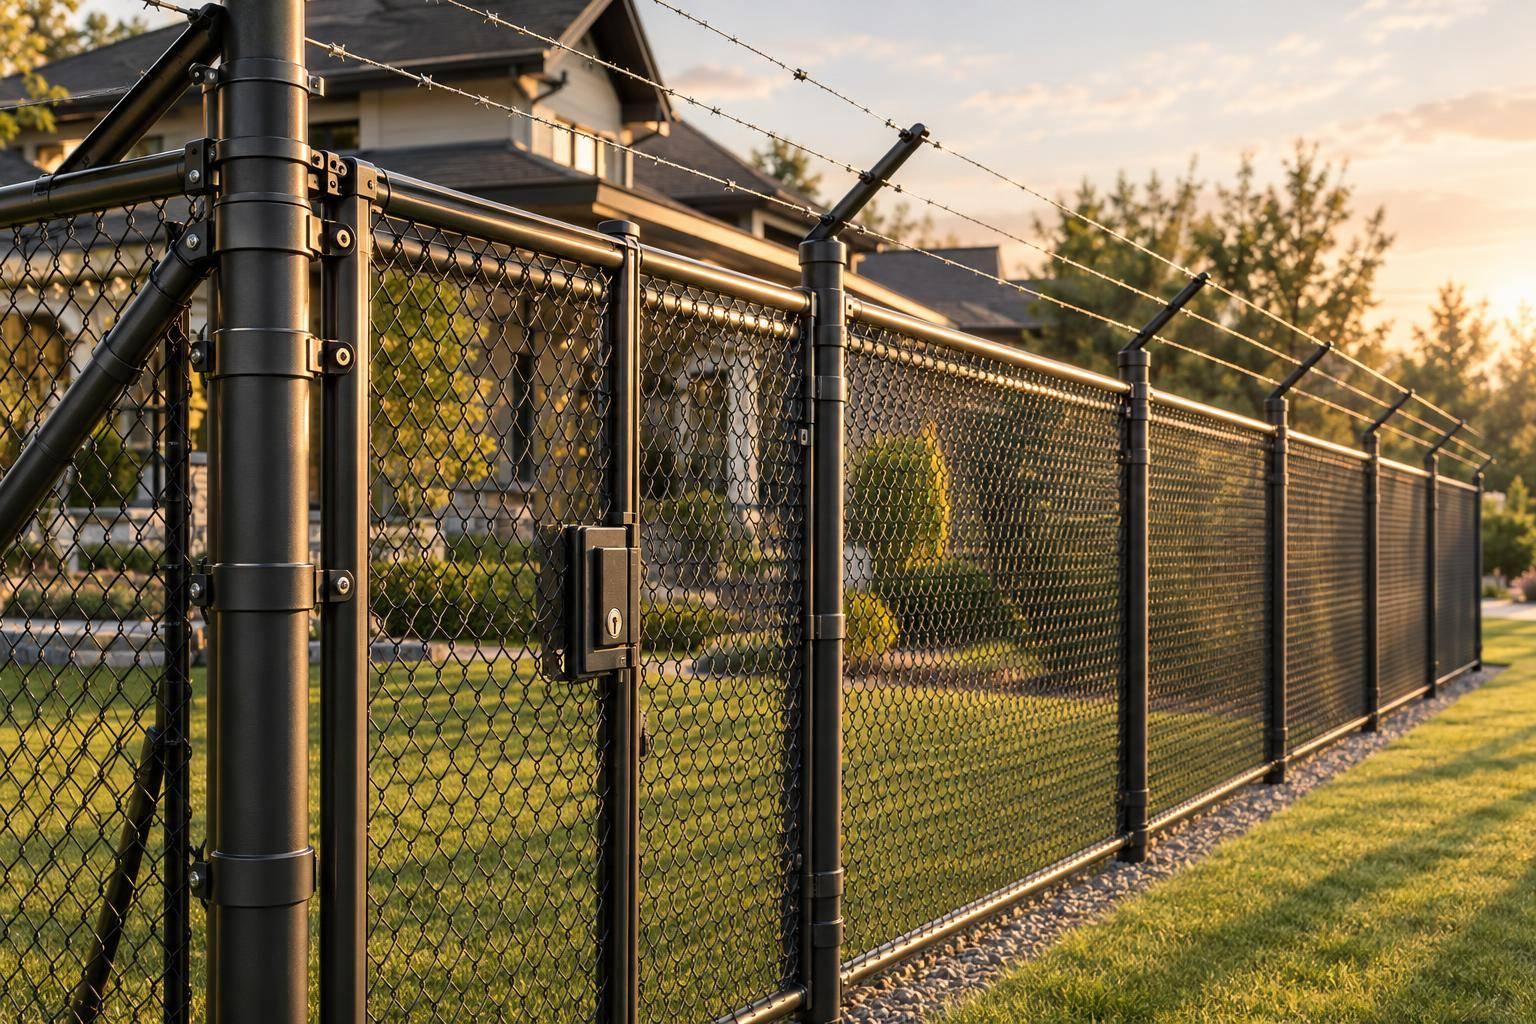
For a high-security chain-link fence, I start with the whole system – not just thicker wire. Mesh openings of 1/2 to 3/4 inch can reduce footholds, but posts, footings, gates, and connections must support the added weight and wind load.
Here’s what I check before ordering:
- Threats and site conditions: Climbing, cutting, lifting, digging, soil, drainage, and wind.
- Materials: Mesh size, wire diameter, finished edges, framework, and separate coatings for fabric, posts, and fittings.
- Connections and barriers: Rails, bottom restraints, tamper-resistant hardware, gates, and topping supports.
- Rules and upkeep: Local permits, topping restrictions, applicable ASTM standards, inspections, and repair duties.
Ordinary chain-link fencing costs about $10–$40 per linear foot in the U.S.; high-security systems need site-specific quotes. I compare installed costs, including excavation, gates, coatings, and maintenance – not material prices alone.
<u>A fence delays intrusion; it does not guarantee prevention.</u> For vehicle threats, I would specify engineered barriers or bollards rather than rely on chain-link fencing.
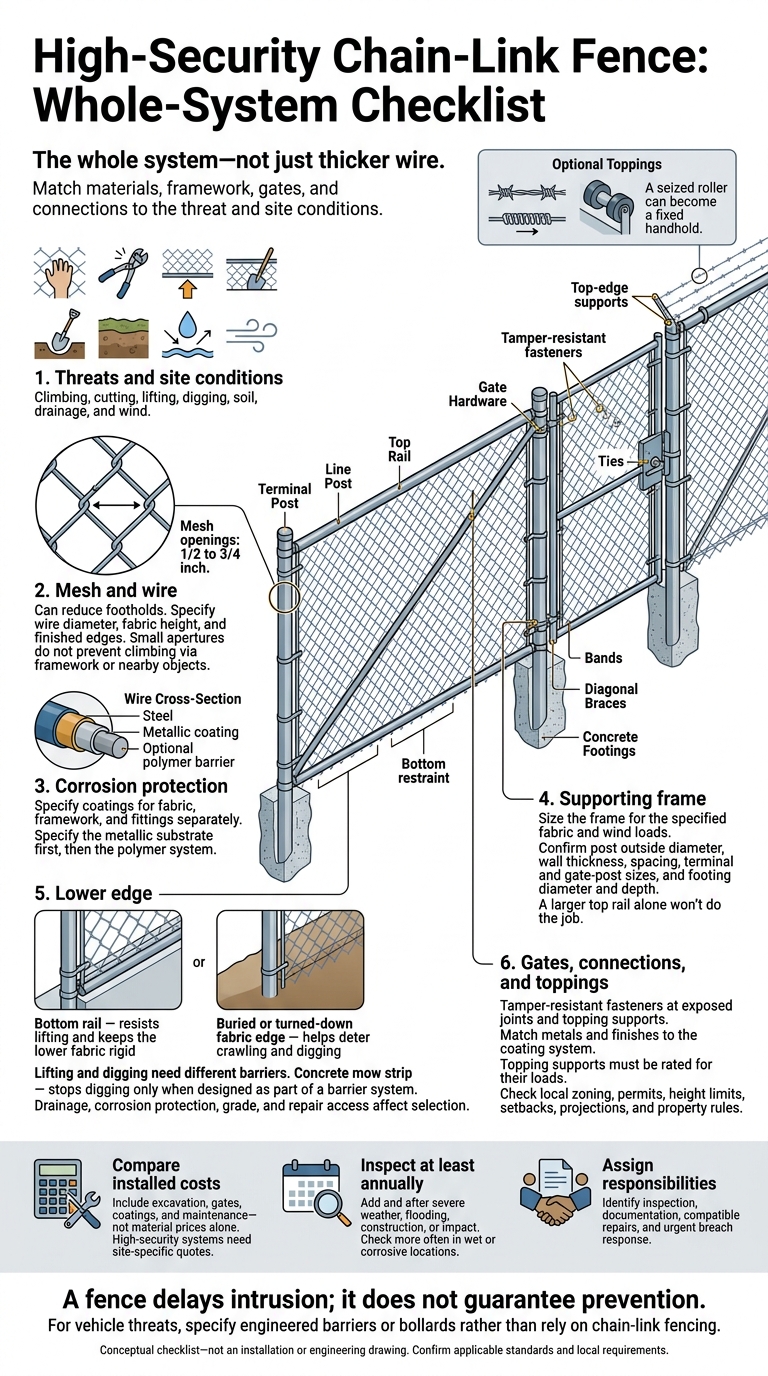
High-Security Chain-Link Fence: Whole-System Checklist
Mini Mesh Chain Link Fence – The Safer Alternative You Don’t See Enough
sbb-itb-d1d0a96
Coatings and Corrosion Protection
Once the frame is sized, coating choice becomes the main protection against rust.
Choose Coatings for Fabric and Framework
Specify coatings for fabric, framework, and fittings separately. The fabric coating alone doesn’t define protection for the entire fence. Each choice affects service life, upkeep, and cost.
Specify the metallic substrate first, then the polymer system. Polymer coatings add color and a barrier over the metallic base, so name both layers in the specification. PVC, polyolefin, and polyester options vary by component and product specification.
| Coating system | Protection and suitable exposure | Inspection and repair | Relative cost |
|---|---|---|---|
| Galvanized fabric and framework | General-purpose protection for many U.S. environments; protection declines faster when steel stays wet or faces salts, fertilizer, or industrial pollutants | Check for exposed steel at cuts, scratches, welds, fasteners, and soil-contact areas; repair with an approved zinc-rich or other compatible coating | Low to moderate |
| Aluminum-coated steel fabric | Aluminum-based protection against atmospheric exposure; confirm compatibility with the project environment and fittings | Check abrasion and connections; use repair materials approved for the substrate | Moderate |
| Zinc–5% aluminum–mischmetal alloy-coated fabric | Mixed metallic protection for harsher exposure and longer maintenance intervals, depending on installation and exposure conditions | Confirm coating class and weight; repair damage with a compatible system | Moderate to high |
| Polymer-coated fabric on metallic-coated wire | Adds a barrier over metallic-coated wire for corrosive sites when specified as a complete system | Check cuts, peeling, abrasion, and exposed wire ends; match repairs to both layers | Moderate to high |
| Polymer-coated framework | Adds a barrier over the framework’s specified metallic protection | Check holes, welds, fittings, and adhesion; use approved touch-up materials | High |
These costs compare materials; they don’t guarantee maintenance savings. Review our warranty details for information on long-term coverage. Coating thickness, adhesion, climate, drainage, and maintenance matter more than color.
Specify Coating Standards and Quality
Match each component to its own standard: ASTM A392 for zinc-coated fabric, ASTM A491 for aluminum-coated fabric, ASTM F1345 for zinc–5% aluminum–mischmetal alloy-coated fabric, and ASTM F668 for polymer-coated fabric. Use the current ASTM edition for each component. These standards aren’t interchangeable.
Require submittals that identify metallic coating weight or thickness, plus polymer type, class, thickness, color, adhesion requirements, and approved repair methods. Set numerical minimums only after checking the selected component and standard.
At delivery, compare the documentation with the purchase order. Inspect representative pieces for bare spots, blisters, peeling, and shipping damage.
Inspect and Repair Corrosion Damage
Inspect at least annually and after severe weather, flooding, construction, or impact. Check more often in wet or corrosive locations. Examine scratches, cut ends, connections, post interiors, caps, and soil-contact areas.
At wet or poorly drained sites, address the cause before repairing recurring rust: redirect irrigation, clear vegetation and mulch, and correct drainage. Clean and prepare damaged areas as the manufacturer requires, then use compatible repair materials – not generic spray paint.
Repair isolated damage when the steel remains sound. Replace components with section loss, perforation, weak connections, or coating failure across large areas. Record locations, photos, repair products, and dates to keep future repairs compatible with the coating system.
Specify rails, barriers, and hardware that remain compatible with the selected corrosion protection.
Rails, Bottom Barriers, and Hardware
Choose Top Rails and Topping Supports
The top rail is part of the load path, not a standalone component. Specify its diameter, wall thickness or strength class, coating, sleeves, and end fittings based on fence height, fabric weight, post spacing, wind load, and the topping system. Run the rail through line-post caps, and use sleeves or couplings at joints that allow thermal movement. Tall or wind-exposed fences may also need intermediate rails or heavier posts. A larger top rail alone won’t do the job.
Where climb resistance matters, specify the upper edge and topping supports together. Barbed-wire arms, razor-ribbon brackets, and rotating anti-climb devices need supports rated for their loads – not lightweight caps.
With the upper edge set, define the lower edge: does the site need lift resistance, dig resistance, or both?
Choose Bottom Rails and Ground Barriers
Lifting and digging need different barriers. Choose the bottom restraint based on the threat, terrain, drainage, and repair access. Installation drawings should show how the restraint follows the grade without leaving crawl-through gaps.
| Bottom option | Security function | Durability | Installation complexity | Upkeep | Relative cost |
|---|---|---|---|---|---|
| Bottom rail | Resists lifting and keeps the lower fabric rigid | High when protected from soil and used with compatible fittings | Moderate | Inspect rail ends, bands, corrosion, and settlement | Medium to high |
| Bottom tension wire | Limits gaps and supports the fabric edge | Moderate; vulnerable to corrosion, impact, and loosening | Low | Retighten and replace damaged wire or clips | Low |
| Buried or turned-down fabric edge | Helps deter crawling and digging | Moderate to high with suitable drainage and coating | High; requires excavation | Inspect for soil erosion, corrosion, and exposed edges | Medium to high |
| Concrete mow strip | Controls vegetation; stops digging only when designed as part of a barrier system | High if properly reinforced and drained | Moderate to high | Repair cracking and settlement; control runoff | Medium |
| Mow strip with a designed below-grade barrier | Combines vegetation control with stronger anti-dig protection | High when engineered for the site | High | Inspect joints, cracks, erosion, and gaps | High |
Install bottom tension wire between terminal posts so it can’t sag away from the mesh. Keep it taut, clip it to intermediate posts, and size it for the selected security design.
Once the lower edge is fixed, secure the fabric to the frame with the right ties, bands, and fasteners.
Specify Ties, Bands, and Fasteners
Use tension bars and bands at terminal, corner, and gate posts, and ties or clips at line posts and rails. Rail ends, sleeves, and post caps keep the frame continuous. Specify tamper-resistant fasteners at exposed joints and topping supports, and match metals and finishes to the coating system. Together, these choices resist disassembly and limit galvanic corrosion, protecting security and service life.
Next, match the topping system to the same load and corrosion requirements.
Security Toppings and Anti-Climb Options
Once the mesh, frame, and lower edge are set, focus on the top edge and nearby perimeter hardware.
Compare Barbed Wire and Razor Ribbon
Size the mesh, posts, and rails for the threat before adding toppings. For barbed wire, specify strand count, arm angle, projection, spacing, wire gauge, coating, and tension. Where sharp toppings are restricted, use smaller apertures or rotating top-edge hardware.
ASTM A121 covers metallic-coated carbon-steel barbed wire – not support-arm strength. TxDOT Item 550 calls for arms at 45 degrees from vertical, clips for three strands, and a 200-pound load requirement at the outer strand. These are project-specific requirements, not design values that apply everywhere.
Razor ribbon and concertina coils create cutting and entanglement hazards. Specify the blade profile, core wire, coil diameter, finish, clips, and replacement procedures. Professional installers need protective equipment, controlled work zones, and safe access. Budget for specialized removal and replacement of damaged coils, too.
Before ordering, check local zoning, permits, height limits, setbacks, projections, and property rules. Even where sharp toppings are allowed, public access, nearby homes, and possible contact with children or animals may make them unsuitable.
Compare Small-Aperture Mesh and Rotating Anti-Climb Devices
Plan small-aperture mesh, wire diameter, gate construction, and top-edge mounts together so they don’t create usable grips. Nearby objects can still give someone leverage.
For rotating anti-climb devices, specify compatible mounts and corrosion-resistant parts. Check how ice, debris, corrosion, and deformation affect movement: a seized roller can become a fixed handhold. Set inspection intervals, follow the manufacturer’s lubrication instructions, and provide safe maintenance access.
| Option | Security function | Climb resistance | Safety | Maintenance | Permit sensitivity | Relative cost* |
|---|---|---|---|---|---|---|
| Barbed wire | Sharp barrier above fabric | Depends on strand layout and arm geometry | Cuts and injury risk near public access | Check tension, corrosion, arms, and fittings | Check location, height, and projection rules | Generally below specialized razor systems |
| Razor ribbon or concertina | Cutting and entanglement barrier | Depends on coil layout and continuous coverage | Serious handling and contact hazards | Inspect coils, clips, and brackets; arrange professional repairs | May be restricted near homes and public access | Generally higher material and installation costs |
| Small-aperture mesh | Reduces usable grips across fabric | Does not prevent climbing via framework or nearby objects | Usually safer than exposed sharp toppings; protect edges and hardware | Inspect fabric and attachments | General fence rules still apply | Moderate to high; aperture and wire size matter |
| Rotating anti-climb devices | Disrupts a stable grip at the top | Depends on free movement and mounting | Pinch, entanglement, and wildlife concerns | Check bearings, rollers, debris, and mounts | Check height, projection, and safety requirements | Moderate to high, including servicing |
Relative costs are planning guides, not installed-price estimates.
Plan Other Perimeter Security Measures
Use only perimeter measures that change the fence’s delay, reach, or access geometry. ASTM F2611-23 guides chain-link security-fence selection, layout, and installation. Confirm the current edition and whether it applies before specifying it.
Where documented risks justify them, added height and stand-off space can add delay. Match posts, mounts, gates, and access clearances to the revised geometry while keeping emergency and maintenance access clear.
Material Costs and Maintenance Planning
Balance Security, Durability, and Cost
Compare installed cost – not just material price – after specifying the system.
Smaller mesh, heavier wire, stronger framework, coatings, and barriers cost more, but they also affect security, life span, and maintenance needs.
| Priority | Installed-cost considerations |
|---|---|
| Higher security | Budget for heavier materials, extra attachments, stronger posts and footings, and installation labor |
| Longer service life | Compare coating and protected-connection costs with the cost of early replacement and corrosion repairs |
| Low upkeep | Include durable coatings, rigid bottom assemblies, secure hardware, and maintenance access |
| Corrosive exposure | Budget for coating verification, compatible repair materials, and regular upkeep |
| High-wind exposure | Account for engineered footings, additional steel and concrete, and attachment labor |
Compare Itemized Installation Quotes
Request prices in U.S. dollars, broken out by fabric and coatings; posts, rails, and hardware; footings and site preparation; labor and logistics; gates and security toppings; and permits, warranty, and cleanup.
To compare bids for equivalent systems, ask for quantities, dimensions, wire diameter, mesh opening, coating type and class, post spacing, footing assumptions, gate sizes, and topping configuration. Mark every item as included, excluded, or an allowance.
Fence length alone doesn’t determine labor costs. Restricted access, slopes, roots, and difficult excavation can change the price even when the length stays the same.
| Quote category | Specifications to match | Common omissions to resolve |
|---|---|---|
| Fabric and coatings | Height, mesh opening, wire diameter, edge type, coating type and class | Coating exclusions; approved touch-up materials |
| Posts, rails, and hardware | Post dimensions and spacing; top and bottom assemblies; ties, bands, fasteners | Bracing, terminal fittings, tamper-resistant hardware |
| Footings and site preparation | Footing dimensions, excavation assumptions, grading | Rock, roots, drainage work, utility conflicts |
| Labor and logistics | Installation scope, layout, equipment, permits, warranty, cleanup | Access limits, hand excavation, existing-fence removal and disposal |
| Gates and security toppings | Gate dimensions, hardware, topping configuration | Automation, specialized installation |
Plano Quote Note
For Plano projects, use this material checklist when requesting a site-specific quote from Tend Fencing.
Assign Inspection and Repair Duties
Once bids are comparable, assign inspection, documentation, and repair duties for the installed fence.
The owner or site manager should handle routine visual checks, while a qualified maintenance provider should perform detailed inspections. Have the provider document the fence’s condition at installation and maintain an as-built parts register with dimensions, coatings, hardware, and approved replacements.
Record damaged fabric, loose ties, displaced bottom assemblies, leaning posts, cracked or undermined footings, corrosion, gate faults, and topping damage.
Name an authorized responder for urgent breaches. Repairs must preserve the fence’s original strength and security function through manufacturer-approved methods and compatible materials. Assign someone to log each repair’s date, location, product, and installer.
Conclusion: Material Specification Checklist
Use this checklist to confirm that each selected component matches the threat profile.
Before ordering, check the material schedule:
- Mesh opening in inches and wire diameter, with gauge in parentheses.
- Fabric height, overall fence height with toppings, and edge type: knuckled, twisted, or knuckle-and-twist.
- Separate coating specifications for the fabric and framework.
Check the supporting frame. Confirm post outside diameter, wall thickness, spacing, terminal and gate-post sizes, and footing diameter and depth. Include top rails, braces, bottom rails or ground barriers, and attachments. Specify topping-support dimensions, spacing, and connections. Size the frame for the specified fabric and wind loads.
Complete compliance checks before purchase. Require applicable ASTM standards, including F1043, F626, and F567, plus manufacturer documentation. Confirm local permit conditions, property-line constraints, and topping restrictions. Assign responsibility for inspections, set inspection intervals, and define repair response times.
Security depends on the full installed system, including gates and connections. No material combination guarantees intrusion prevention or a fixed service life.
FAQs
Can I upgrade my existing chain-link fence for higher security?
Yes. You can increase the fence height to 8–10 feet, add barbed wire extensions, or install cameras, motion-activated lighting, and alarms. Privacy slats offer more privacy and can help discourage climbing.
If the fence shows signs of wear, inspect and reinforce the existing posts and hardware. Check local building codes and regulations before increasing the height or adding structural features.
How do I balance mesh size with wire thickness?
A lower gauge number means thicker, stronger wire. Residential projects typically use 9-gauge fabric. Commercial or high-security fences typically use heavier 6-gauge wire for more strength and resistance to cutting.
Smaller mesh openings form a denser barrier, but they can limit visibility. Thinner wire or larger openings cost less, but they also provide less strength. Choose wire gauge and mesh size based on your site’s security risks and the clear sightlines needed for surveillance.
How can I keep gates as secure as the fence?
Choose gates that match your chain link fence’s height and strength. Gates handle more movement and stress, so use heavy-duty hinges and secure locks, such as deadbolts, electronic keypads, or smart locks. Avoid horizontal rails that could serve as footholds. Make sure the latch works smoothly and leaves no gaps.
Lubricate hinges and locks regularly. Check for loose hardware and corrosion once a year, and fix any problems before they weaken security.